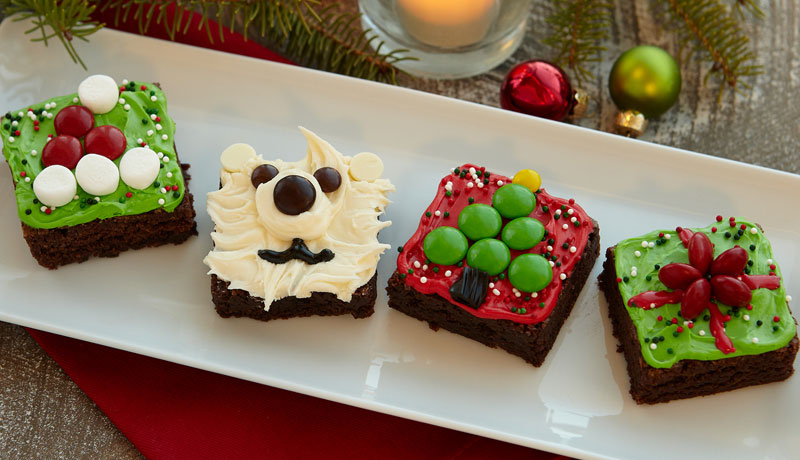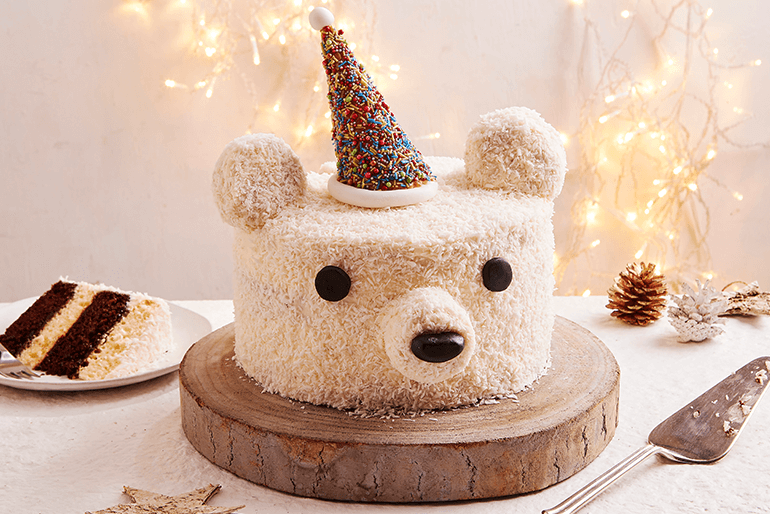
Polar Bear Cake
3 Hours
Total
24 Servings
Our cute polar bear is sure to be adored by everyone this Christmas. And with a delightful combo of both vanilla and chocolate cake, there’s no end to the appeal of this charming character!
Ingredient List
- 210ml vegetable oil, plus extra for greasing
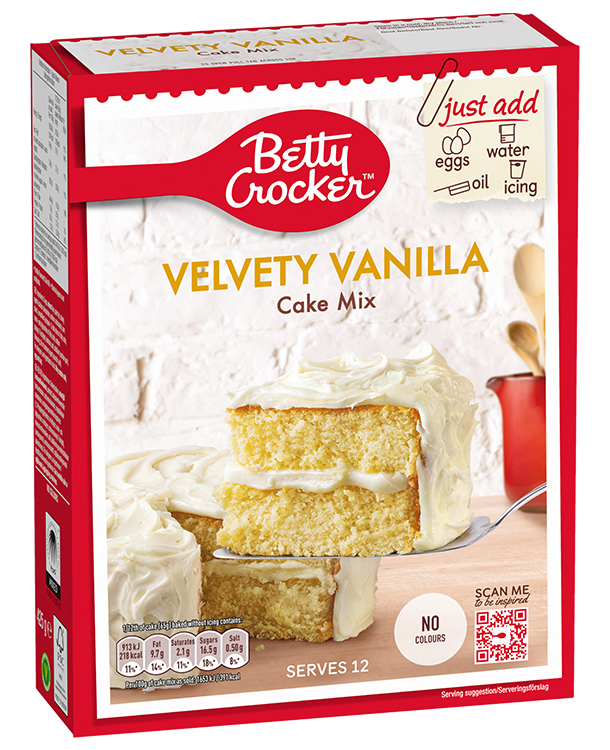
- 1 box Betty Crocker™ Velvety Vanilla Cake Mix
- 410ml milk or water
- 6 medium eggs
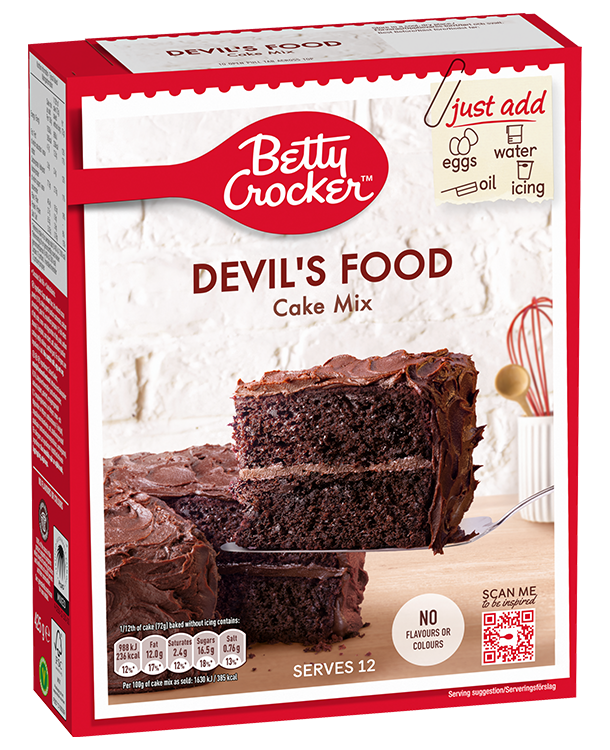
- 1 box Betty Crocker™ Devil’s Food Cake Mix
- 1/2 tub Betty Crocker™ Indulgent Chocolate Fudge Icing
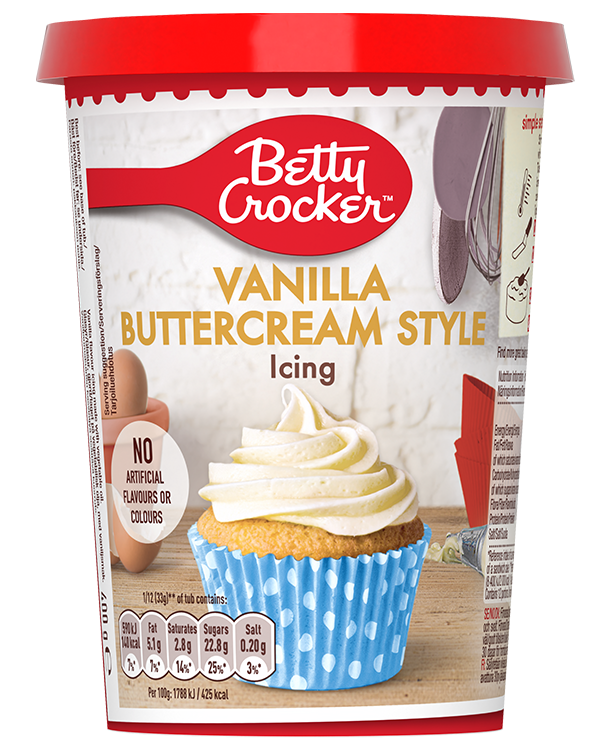
- 1 1/2 tubs Betty Crocker™ Vanilla Buttercream Style Icing
- 150g desiccated coconut
- 20g black ready to roll icing
- Cornflour, for dusting
For the Christmas party hat (optional)
- 1 waffle ice-cream cone
- 1 tablespoon runny honey or golden syrup
- 30g rainbow or colourful sprinkles
- 30g white ready to roll icing
Preparation
- Preheat the oven to 180°C (160°C for fan assisted ovens)/Gas Mark 4. Grease and line 4 x 20cm round cake tins. Make up the vanilla cake mix using the milk or water, oil and eggs as directed on the box. Place 3 fairy cake cases in a cupcake tray; fill each with 25g of the batter. Divide the remaining batter between 2 of the cake tins, and cover with cling film. Bake the fairy cakes for 15 mins until a toothpick comes out clean. Transfer to a wire rack to cool. Remove the paper cases.
- Meanwhile, make up the Devil’s Food Cake Mix using milk or water, oil and eggs as directed on the box. Divide the batter between the 2 remaining cake tins.
- Uncover the tins of vanilla batter and bake all the large cakes for 22-28 minutes (only 22-25 minutes for the vanilla cakes) until a rounded knife inserted into the middle of each cake comes out clean. Cool in the tins for 5 minutes, then remove and transfer to wire racks to cool completely. Remove the baking paper linings.
- Trim the tops of the cakes to level, if needed. Starting with a chocolate cake, place on a cake board (secure in place with a little dollop of the chocolate fudge icing). Sandwich the cakes together (in alternate flavours) using the chocolate fudge icing (leave a 1cm border around the edge clear of the filling); the bottom side of the top cake should be facing up.
- Set aside 70g of the vanilla icing and coat the entire cake with the remaining icing, using a palette knife to smooth the top and sides.
- Use 45g of the reserved icing to fully coat 2 of the cupcakes using a cutlery knife, and coat only the base and sides of the remaining cupcake. Place 25g of the desiccated coconut in a small bowl, dip the cupcakes in the coconut to completely coat 2 of the cupcakes and coat the base and sides of the remaining cupcake.
- Place the cake board on a wire rack over a baking tray. Using the remaining 125g desiccated coconut, gently press all over the top and sides of the cake, regathering as necessary, so the cake is completely and generously covered. Set aside any leftover desiccated coconut.
- To make the 'snout', take the cupcake with the plain top and trim the top a little if necessary, then spread the top with a little of the reserved icing. Insert 2 cocktail sticks into the centre of the side of the main cake. Push the cupcake (buttercream side facing towards the cake) onto the cocktail sticks. Secure in place with 2 trimmed long wooden skewers pushed side-by-side into the centre of the ‘snout’ so that each stops just before the back of the cake.
- Place the remaining reserved icing in a disposable piping bag. Snip a small hole in the end and pipe around the join where the ‘snout’ meets the cake. Press a little of the desiccated coconut onto it to make a seamless ‘join’.
- Roll half the black icing into a ball and shape into an oblong ‘nose’. Push 2 cocktail sticks into the front of the ‘snout’ on the top edge, then push the black icing ‘nose’ onto the cocktail sticks to secure in place.
- On a surface dusted with cornflour, roll the remaining black icing and stamp out 2 x 2cm rounds using a cutter for ‘eyes’. Secure in place using a little icing from the piping bag.
- Insert 2 trimmed skewers vertically into the cake to secure the 2 remaining cupcakes in place for ‘ears’ (the smaller base of the cakes should be facing towards the front).
- If making the hat, use a pastry brush to coat the ice-cream cone with the honey or golden syrup. Place the sprinkles in a shallow bowl. Turn the ice-cream cone in the sprinkles to coat. Roll 3g of the white icing into a ball and push onto the top of the ‘hat’. Roll the remaining white icing into a sausage-shape. Bend round into a circle to fit the base of the ‘hat’, trimming if necessary, and position on top of the cake. Insert a trimmed skewer into the top of the cake to help anchor the ‘hat’. Carefully place the ‘hat’ over the skewer, pressing gently onto the icing circle.
Tips
- If you only have two cake tins, bake the vanilla cakes first; then clean, grease and re-line the tins and make and bake the chocolate cakes.
- A serrated bread knife works well to level cakes. Levelling the cakes will give a sturdy base for a four-layer cake.
- After decorating, serve immediately, or keep for up to 3 days, covered in a cool dry place at room temperature or in the fridge. If you’re not serving the cake straight away, only decorate the ice cream cone ‘hat’ and add to the cake shortly before serving, otherwise the colours in the sprinkles may dissolve and run on top of the cake. If storing outside the fridge, try chilling for 30 mins before serving – the humidity of the fridge will make the black icing eyes and nose shine!