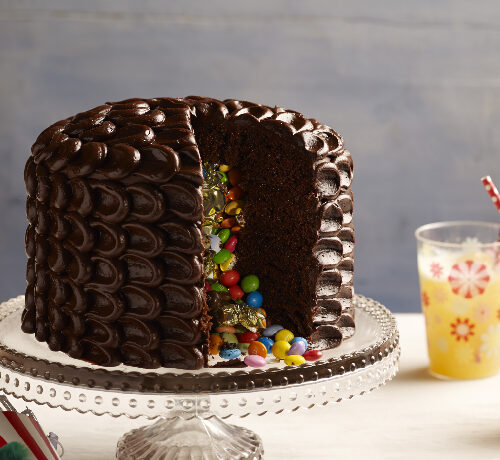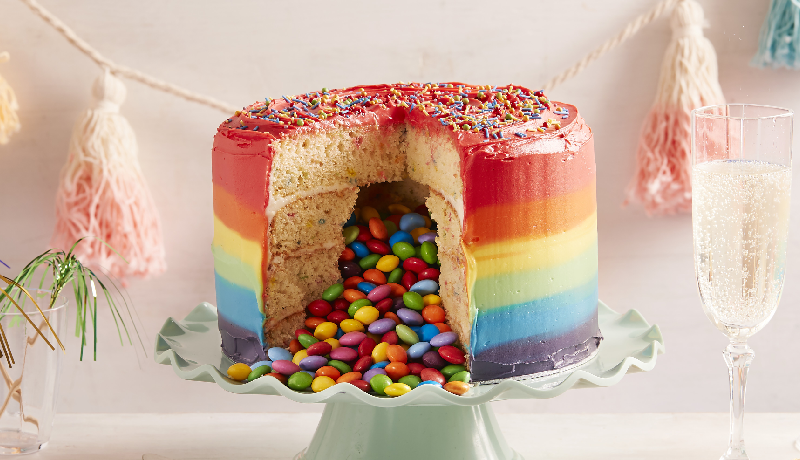
Rainbow Piñata Cake
3 Hours
30 Minutes Total
24 Servings
Whether it’s a Pride event or children’s party this impressive rainbow iced cake will make the perfect centrepiece!
Ingredient List
- Vegetable oil, for greasing
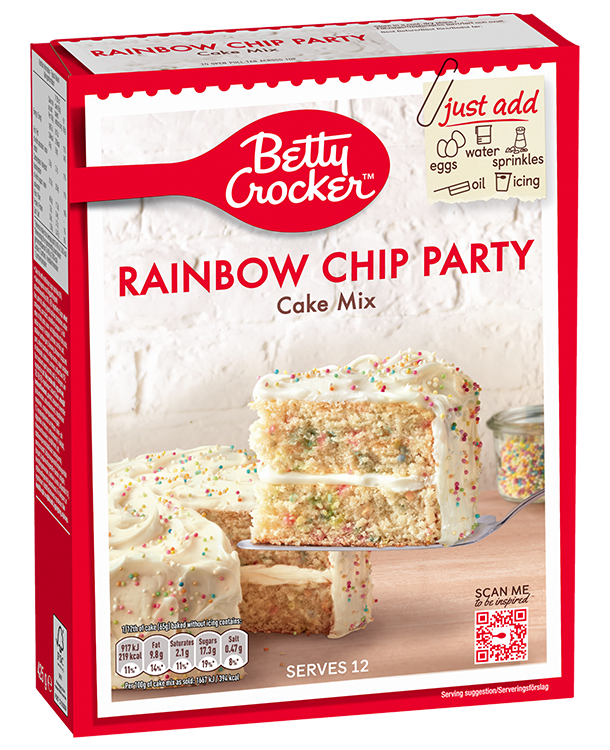
- 2 box Betty Crocker™ Rainbow Cake Mix
- 6 medium eggs
- 180 ml vegetable oil or 180g butter, melted
- 360 ml water or milk
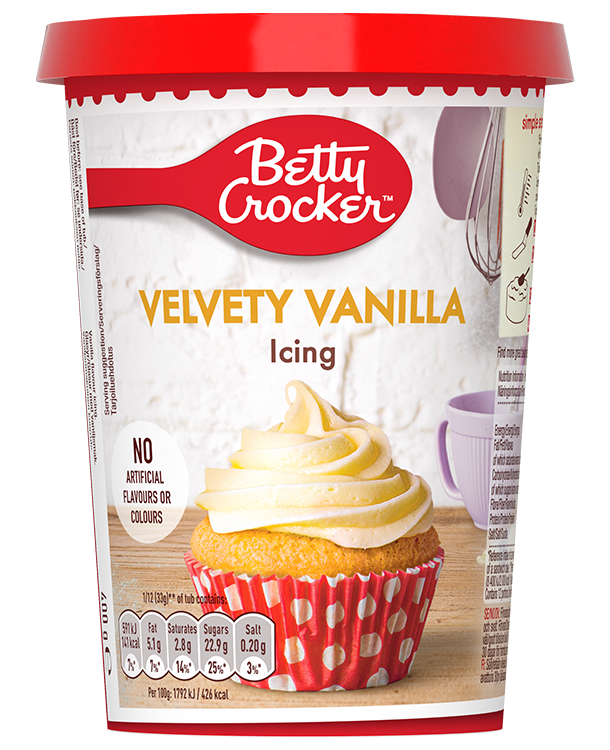
- 3 tubs Betty Crocker™ Velvety Vanilla Icing
- 350 g rainbow coloured candy coated sweets
- Red, orange, yellow, green, blue and purple food colouring gels or pastes
- 2 teaspoons rainbow coloured sugar sprinkles
Preparation
- Preheat the oven to 180°C (160°C for fan assisted ovens)/Gas Mark 4. Grease and line 4 x 20xm round cake tins. Make, bake and cook the cakes as directed on the box with the eggs, oil (or melted butter) and water (or milk). If you only have two cake tins make and bake one mix then clean the tins and make and bake the second mix.
- Using an 8cm round cookie cutter, stamp out a hole in the centre of two of the cakes. Place one whole cake on a 20cm round thin cake board. Place the cookie cutter in the centre of this cake (as a guide to match the hole removed from the two cakes) and spread 100g of the icing on the cake outside of the cutter. Remove the cutter.
- Top with one of the cut-out cakes and spread this cake with another 100g of icing. Top with the second cut-out cake. Fill the cavity with the sweets. Spread another 100g of icing around the second cut-out cake and place the remaining whole cake on top with the flat underside facing up.
- Spread 250g of the icing in a thin layer over the top and sides of the cake, smoothing with a palette knife (this is called the crumb coat and gives a smooth surface to apply the rainbow icing). Chill in the fridge for 30 minutes or until firm to the touch.
- Meanwhile, place 200g of the remaining icing in a small bowl and beat in enough red food colouring gel or paste to give a bright red colour. Divide the rest of the icing between five small bowls (approx. 90g in each bowl) and use the orange, yellow, green, blue and purple gels or pastes to colour each bowl of icing (see Tips).
- Place the cake on a decorating cake turntable. Using a small palette knife, spread the purple icing in a 2cm layer around the base of the cake. Repeat with the blue, green, yellow and orange icings and half the red icing to cover the side of the cake completely in a rainbow effect. (If it is particularly warm, place the bowls you are not using in the fridge until you need them.) Don’t worry if the different colours overlap slightly. Use the remaining red icing to cover the top of the cake.
- Drag a cake icing smoother or long palette knife around the icing on the side of the cake, keeping the turntable rotating to get a smooth finish and gently merge the different icing colours together. You may need to do this a second time. Use the tip of a small palette knife to create a ridged pattern in the icing on top of the cake then scatter over the rainbow sprinkles. Chill in the fridge for 1 hour for the icing to set firmly before serving.
Tips
- Food colouring gels and paste can vary in the depth of colour. Add sparingly at first and beat the icing thoroughly to get an even colouring, adding a little more gel or paste, if needed.
- A cake turntable will help to give the iced cake a smooth finish. If you don’t have one, use the palette knife to spread and merge the icings together as you go, then drag the tip of the knife around the cake from the bottom to the top to give a ridged effect.