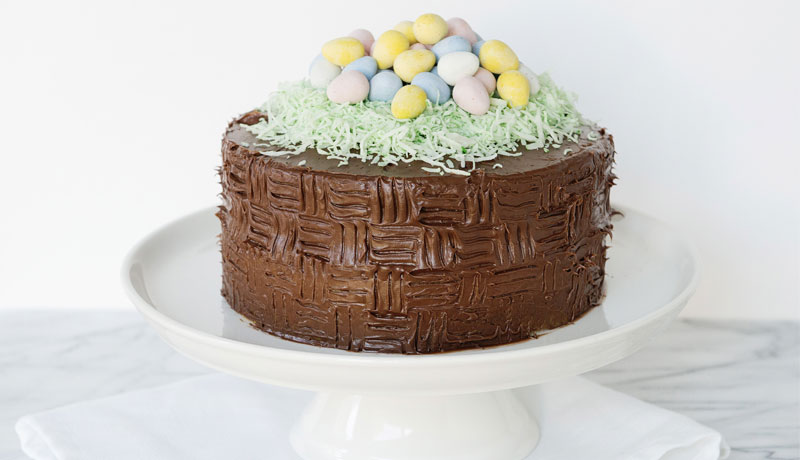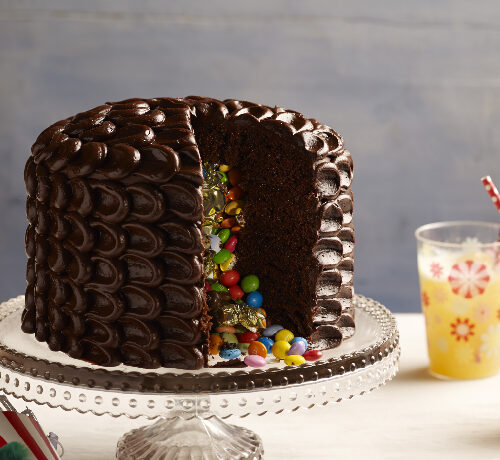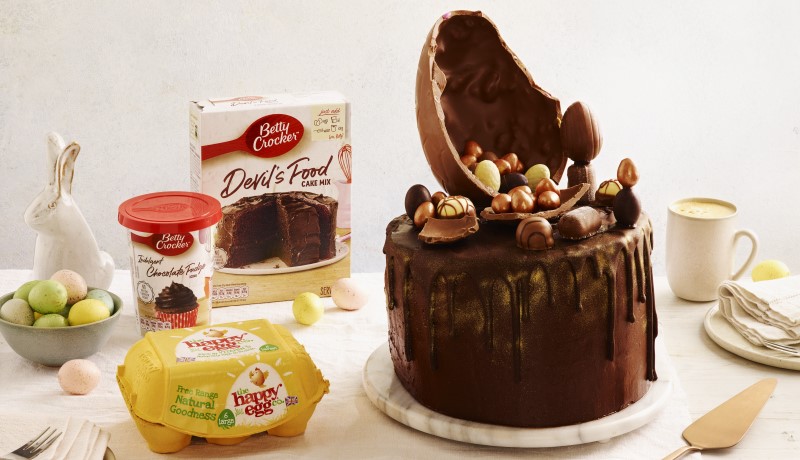
Chocolate Overload Cake
1 Hour
45 Minutes Prep
2 Hours
15 Minutes Total
24 Servings
If you can’t decide between Easter eggs and chocolate cake, then have them both with this indulgent chocolate drip cake! Have fun creating a chocolatey masterpiece using melted chocolate and a variety of Easter eggs to take your creation to dizzy heights.
Ingredient List
- 240ml vegetable oil, plus extra for greasing
- 2 boxes Betty Crocker™ Devil’s Food Cake Mix
- 460ml water or milk
- 6 medium Happy Eggs
- 2 tubs Betty Crocker™ Indulgent Chocolate Fudge Icing
- 250g dark chocolate (85% cocoa solids)
- 1 large milk chocolate Easter egg, broken into large pieces, keeping one half almost intact
- 55g small glitter chocolate eggs
- 90g mini dark, milk and white solid (or filled) eggs
- 1 (40g) small filled or (14.5g) hollow egg
- 4 chocolate truffles Edible gold lustre spray
Preparation
- Preheat the oven to 180°C (160°C for fan assisted ovens)/Gas Mark 4. Grease and line 4 x 20cm round cake tins. In a very large bowl, beat the cake mixes, with the water or milk, 240ml oil and the Happy Eggs, and combine with an electric hand whisk for 2-3 minutes until smooth and creamy. Divide equally between the cake tins.
- Bake for 23-28 minutes until a toothpick inserted into the middle of each cake comes out clean. Cool in the tins for 5 minutes, then remove and transfer to cooling racks to cool completely. Remove the baking paper linings.
- Trim the tops of the cakes to level, if needed. Place the base layer on a cake board (secure in place with a little dollop of icing). Sandwich the cakes together using 250g of the fudge icing – the bottom side of the top cake should be facing up. Coat the entire cake with the remaining icing using a cutlery knife. Slightly dampen a palette knife or cake scraper with water and use to smooth the top. Clean and dampen the palette knife or cake scraper, then use to smooth the sides – sweep around the cake with a little pressure – this will help to spread the excess buttercream and fill any holes so you have a smooth finish. If there are still one or two gaps or holes, fill with excess buttercream taken from the cake scraper and smooth again. You will have little peaks at the top of the cake. Use an off-set spatula, held horizontally to draw these peaks into the centre of the cake. Freeze for 5 minutes.
- Meanwhile, melt 225g of the chocolate in a microwave-safe jug; heat in 20 second bursts, stirring after each burst, until the chocolate is melted and very runny.
- Remove the cake from the freezer. Pour the runny chocolate around the top of the cake, next to the edge, allowing it to trickle down the sides. Continue drizzling in a spiral motion to cover the top. If there are any holes, cover with a drop of chocolate. Smooth the top gently with an off-set spatula. Chill for 10 minutes to set.
- Meanwhile, melt the remaining chocolate in a microwave-safe jug and heat in 20 second bursts, stirring after each burst, until melted but still thick like a glue. Use the thick melted chocolate to stick the egg pieces, eggs and chocolate truffles to the cake (see Tips). Start with the largest piece and build around this as you like. Some of the smaller eggs will sit in the curve of the larger egg pieces without the need to ‘stick’ them. Leave for a few minutes for the chocolate to set. Spray the ‘chocolate drip area’ with the edible gold lustre spray, then serve.
Tips
- When ‘sticking’ chocolate eggs or pieces of chocolate egg to the top of the cake in a vertical position, it’s a good idea to have another piece of broken chocolate (or a chocolate truffle depending on the size) to use as support for it to lean against while it sets fully.
- A serrated bread knife works well to level cakes. Leveling the cakes will give a sturdy base for your four-layer cake. Apply the icing filling, little and often, with a cutlery knife, then spread to smooth – this will avoid crumbs dragging across the top of each layer.
- Use the gold lustre spray to spray inside some of the larger pieces of broken chocolate egg, if you like.
- If you do not have four of the same size cake tins, you can make up one pack of cake mix and divide between two cake tins. Bake and cool the cakes, then use the tins again to bake the other pack of cake mix so that you have four cakes altogether.
- Our design has one large egg as a focal point. Get experimenting and use this as a base design, surrounding it with your favourite smaller eggs and chocolates.